


Sweet and Simple Holiday Craft Tutorial

I don’t want this to be a place where you have to read my entire life story before you get down to the recipe or tutorial. I can’t stand that. And who has the time? You’ll get to know bits about me along the way, I’m sure.
So, I’m jumping right in with my first post. I made these last December (and the year before) and mailed them out to my ig followers. It was a fun way to give back. A little, thank you for following along, gift. This year these little Florida oranges are doing double duty…first as place settings for Thanksgiving and then as Christmas ornaments.
Here’s how to make them.
Supplies:
Craft Wooden Disks Twine is included with this kit.
Craft Paint orange, green, and white
Acrylic Paint Pen These are my favorite paint pens.
Paint Brushes Nothing fancy…any small brush will do.
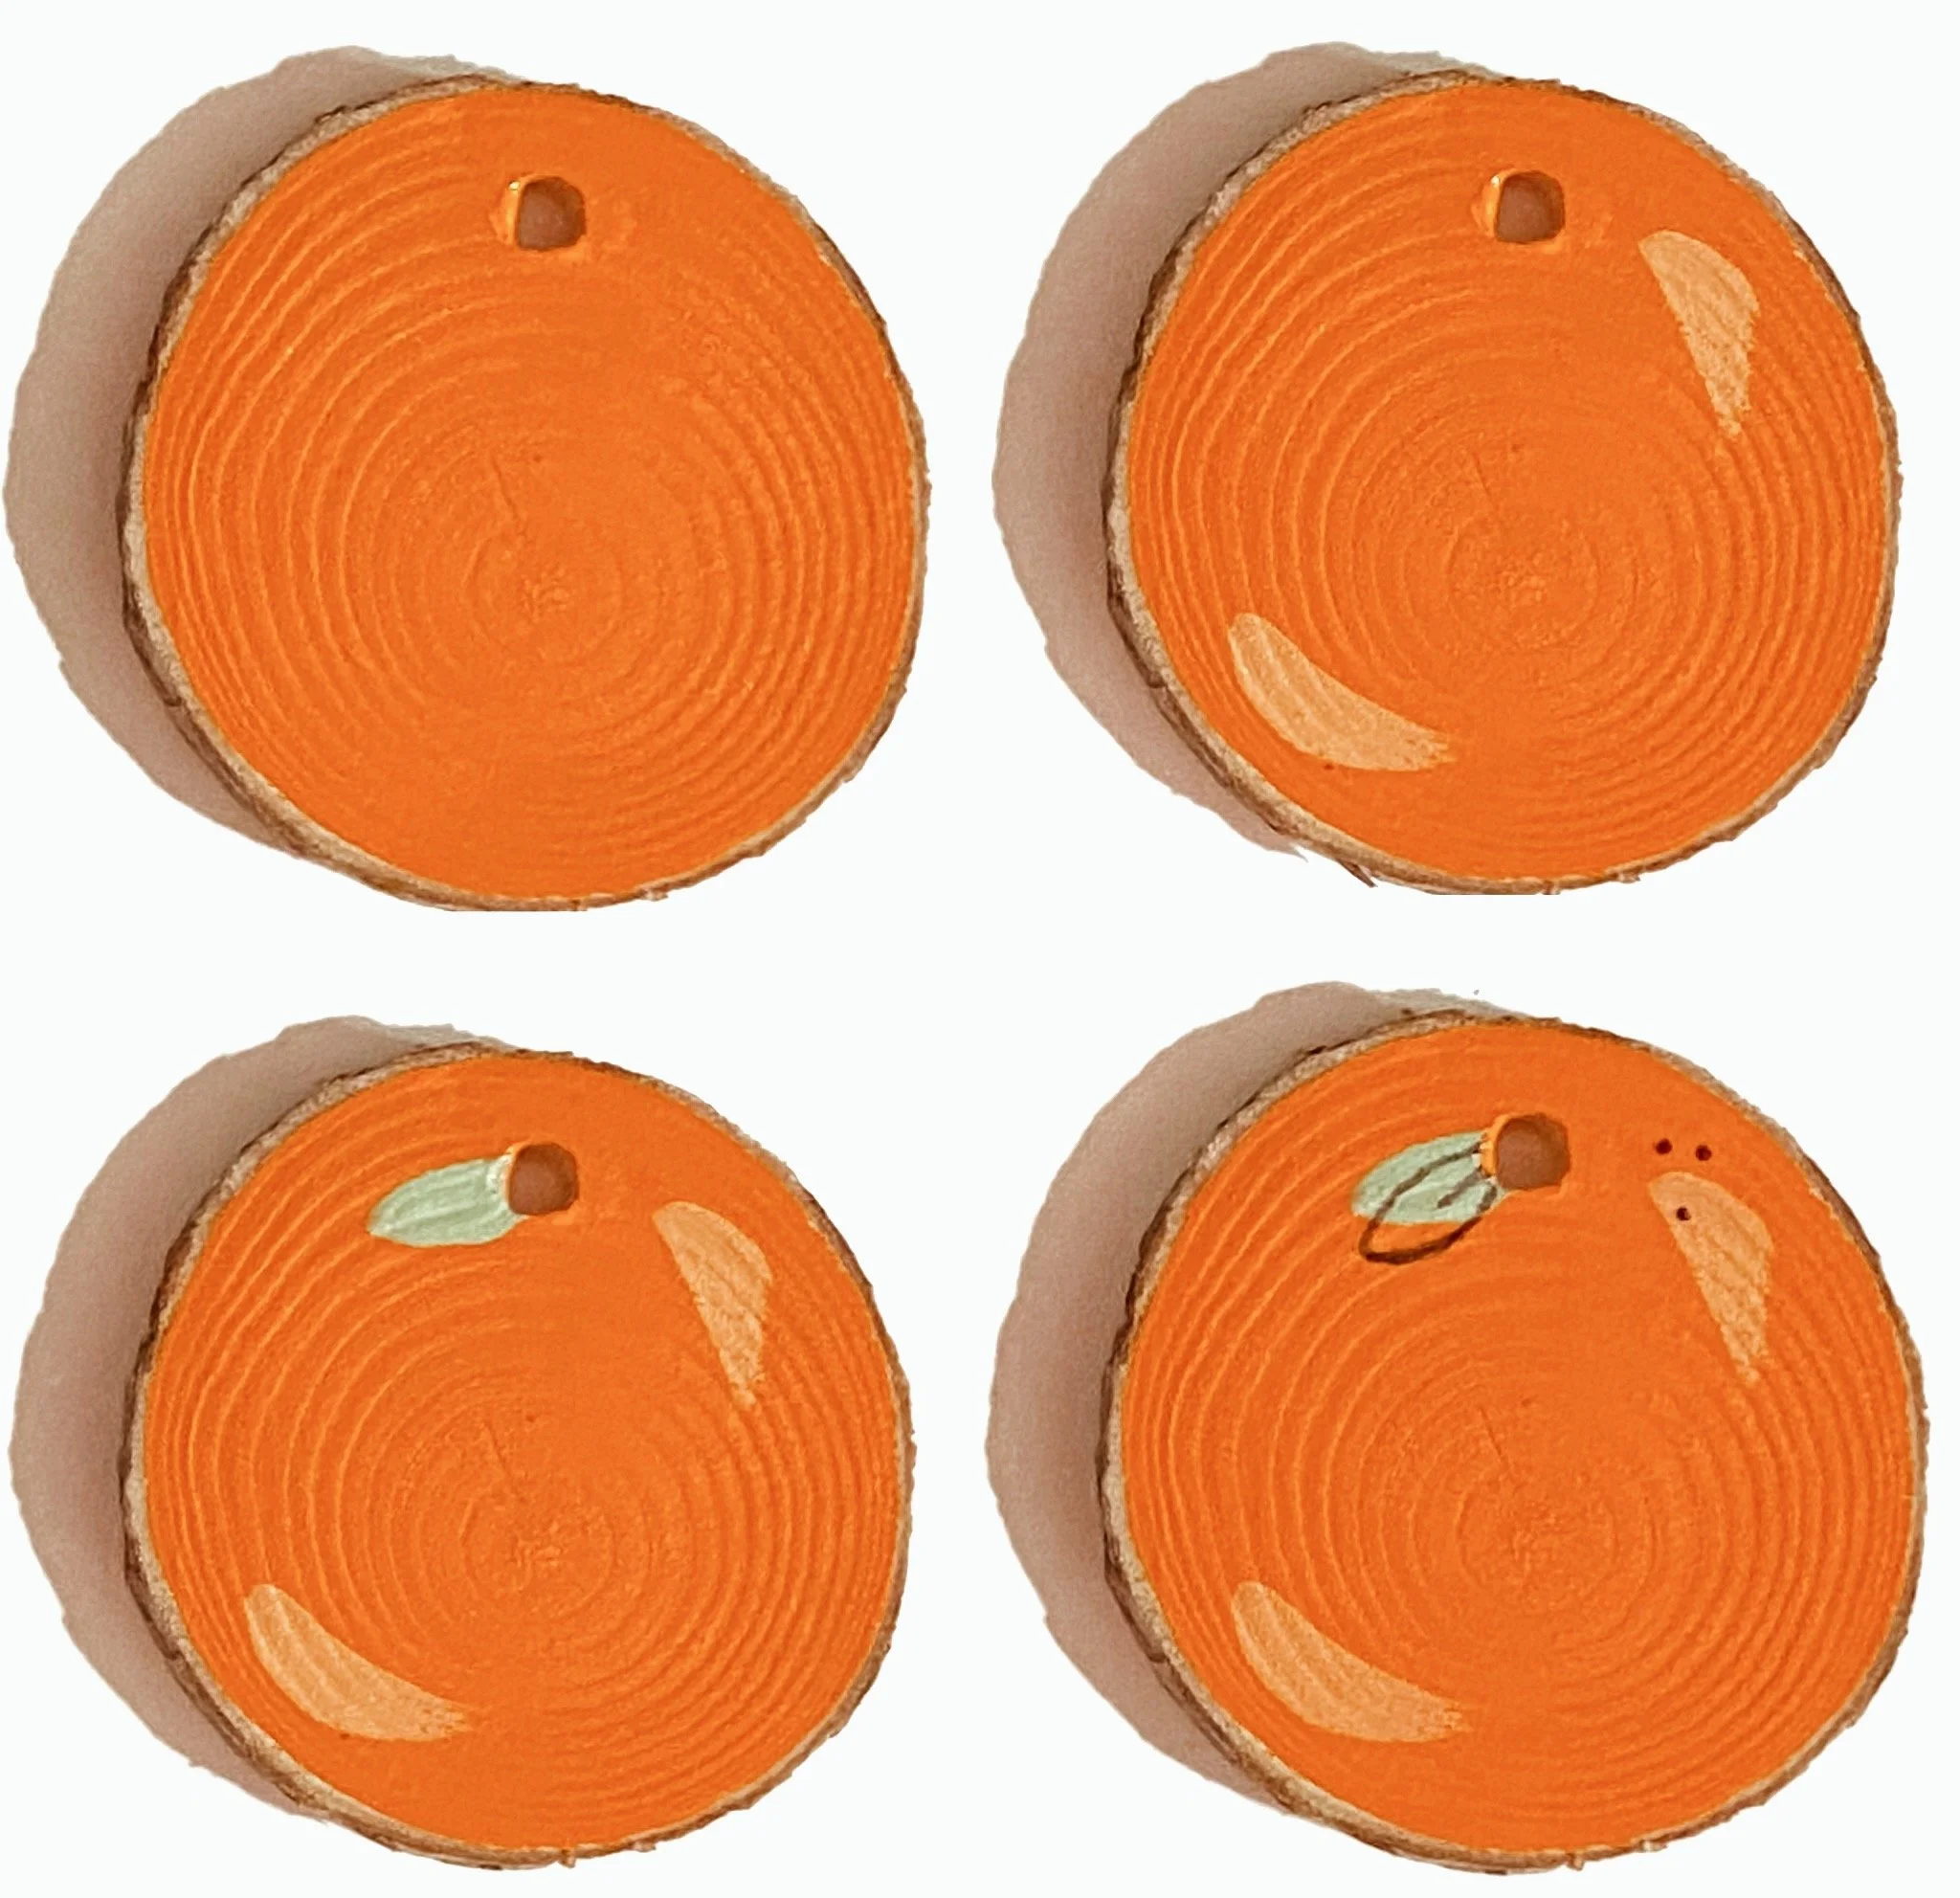
Paint one side of the wooden disk orange leaving the bark unpainted. Let dry.
Mix a little white and orange paint to create a lighter shade of orange. Swipe a couple highlights on the disk.
Paint a small, green leaf near the pre-drilled hole.
Once the paint is dry, use your acrylic paint pen to outline the leaf and add a few dots.
Flip over and repeat steps 1-4.
If you’re making an ornament, string the twine through the hole in the disk and tie a knot.
For a place setting, write your guest’s name on the orange with the acrylic paint pen, roll a napkin, and tie the twine securely around the napkin with a bow (for easy removal).


